16. Smart School
In this smart school, we will guide you to develop an Internet of Things application system that integrates environmental monitoring and equipment control. In this system, we can monitor environment conditions such as temperature, humidity and light intensity in the classroom in real time through the web. It also supports remote control of the opening/closing of curtain, the on/off of classroom light and street lamp, as well as the status of the school gate. Now let’s join hands to contribute to the construction of green and smart school!
Code Flow
        flowchart LR
    A[User<br>web page] --> B[ESP32<br>server]
    B --> C[Sensors]
    B --> D[Actuators]

    subgraph C [Sensors]
        C1[Temperature]
        C2[Humidity]
        C3[Light intensity]
    end

    subgraph D [Actuators]
        D1[Street lamp]
        D2[Classroom light]
        D3[Curtain]
        D4[Door<br>/School gate]
    end
Test Code
#include <WiFi.h>
#include <WebServer.h>
#include <Wire.h>
#include <AHT20.h>
#include <Stepper.h>
#include <ESP32Servo.h>
#include <Adafruit_GFX.h>
#include <Adafruit_SH110X.h>
#include <Adafruit_NeoPixel.h>
// Replac with your WiFi name and passwords
const char* ssid = "YourWiFiSSID";
const char* password = "YourWiFiPassword";
// OLED configuration
#define SCREEN_WIDTH 128
#define SCREEN_HEIGHT 64
#define OLED_RESET -1 // Share I2C reset
#define I2C_ADDRESS 0x3C // Default address of SH1106
// Define pins
#define LIGHT_SENSOR_PIN 34
#define LED_PIN 12
#define RGB_LED_PIN 4
#define SERVO_PIN 32
// Configure RGB
#define RGB_LED_COUNT 4
Adafruit_NeoPixel rgbLeds(RGB_LED_COUNT, RGB_LED_PIN, NEO_GRB + NEO_KHZ800);
// Create a display object
Adafruit_SH1106G display(SCREEN_WIDTH, SCREEN_HEIGHT, &Wire, OLED_RESET);
// Set stepper motor
const int STEPS_PER_REV = 2038; // Actual steps per turn
const int MOTOR_PIN1 = 14; // IN1
const int MOTOR_PIN2 = 27; // IN2
const int MOTOR_PIN3 = 16; // IN3
const int MOTOR_PIN4 = 17; // IN4
// Initialize the stepper motor (note the pin sequence: IN1-IN3-IN2-IN4)
Stepper myStepper(STEPS_PER_REV, MOTOR_PIN1, MOTOR_PIN3, MOTOR_PIN2, MOTOR_PIN4);
// Servo
Servo myservo;
int servoAngle = 180;
// Sensor instance
AHT20 aht20;
// Web server instance
WebServer server(80);
// Set the RGB to white
void setRGBWhite() {
for (int i = 0; i < RGB_LED_COUNT; i++) {
rgbLeds.setPixelColor(i, rgbLeds.Color(255, 255, 255));
}
rgbLeds.show();
}
// Turn off RGB
void setRGBOff() {
for (int i = 0; i < RGB_LED_COUNT; i++) {
rgbLeds.setPixelColor(i, rgbLeds.Color(0, 0, 0));
}
rgbLeds.show();
}
void setup() {
Serial.begin(115200);
// Initialize the pin
pinMode(LED_PIN, OUTPUT);
digitalWrite(LED_PIN, LOW);
// Initialize the RGB strips
rgbLeds.begin();
rgbLeds.setBrightness(100);
setRGBOff(); // The initial state is off
// Initialize the speed of the stepper motor
myStepper.setSpeed(10);
// Initialize the servo
myservo.attach(SERVO_PIN);
myservo.write(servoAngle);
Wire.begin(); // Initialize I2C bus
// Check whether the AHT20 is connected properly
if (aht20.begin() == false) {
Serial.println("AHT20 not detected. Please check wiring.");
while (1);
}
Serial.println("AHT20 acknowledged");
// Initialize OLED
if(!display.begin(I2C_ADDRESS, true)) { // true is 128x64 resolution
Serial.println("SH1106 initialization failed");
while(1); // Stuck and not continuing
}
// Clear the screen and set the text properties
display.clearDisplay();
display.setTextSize(1); // text size
display.setTextColor(SH110X_WHITE); // Monochrome display
display.setCursor(10, 25); // Set the starting position (center)
// Connect to WiFi
WiFi.begin(ssid, password);
Serial.print("Connecting to WiFi...");
while (WiFi.status() != WL_CONNECTED) {
delay(500);
Serial.print(".");
}
Serial.println("");
Serial.println("WiFi is connected");
Serial.print("IP: ");
Serial.println(WiFi.localIP());
display.println(WiFi.localIP());
display.display();
// Set server routing
server.on("/", handleRoot); // Root path
server.on("/data", handleData); // Data API path
server.on("/control", handleControl); // Control path
// Start the server
server.begin();
Serial.println("The HTTP server has been started.");
}
void loop() {
server.handleClient(); // Handle client requests
}
// Handle root path requests
void handleRoot() {
String html = R"=====(
<!DOCTYPE html>
<html>
<head>
<meta charset="UTF-8">
<meta name="viewport" content="width=device-width, initial-scale=1">
<title>Smart School Control System</title>
<style>
body {
font-family: Arial, sans-serif;
text-align: center;
margin: 0;
padding: 20px;
background: #f0f8ff;
}
.container {
max-width: 1000px;
margin: 0 auto;
background: white;
padding: 20px;
border-radius: 10px;
box-shadow: 0 4px 8px rgba(0,0,0,0.1);
}
h1 {
color: #2c3e50;
margin-bottom: 20px;
}
.dashboard {
display: grid;
grid-template-columns: repeat(auto-fit, minmax(300px, 1fr));
gap: 20px;
margin: 20px 0;
}
.card {
background: #f9f9f9;
padding: 20px;
border-radius: 10px;
box-shadow: 0 2px 5px rgba(0,0,0,0.1);
}
.card h2 {
color: #3498db;
margin-top: 0;
margin-bottom: 15px;
}
.value {
font-size: 28px;
font-weight: bold;
color: #2c3e50;
margin: 10px 0;
}
.btn {
padding: 12px 20px;
margin: 5px;
border: none;
border-radius: 5px;
cursor: pointer;
font-weight: bold;
}
.btn-on {
background: #2ecc71;
color: white;
}
.btn-off {
background: #e74c3c;
color: white;
}
.update-time {
color: #95a5a6;
margin-top: 20px;
font-size: 14px;
}
</style>
</head>
<body>
<div class="container">
<h1>Smart School Control System</h1>
<div class="dashboard">
<div class="card">
<h2>Temperature monitoring</h2>
<div class="value" id="temperature">--</div>
</div>
<div class="card">
<h2>Humidity monitoring</h2>
<div class="value" id="humidity">--</div>
</div>
<div class="card">
<h2>Light intensity</h2>
<div class="value" id="light-value">--</div>
</div>
<div class="card">
<h2>Street lamp</h2>
<div>
<button class="btn btn-on" onclick="controlDevice('led', 'on')">ON</button>
<button class="btn btn-off" onclick="controlDevice('led', 'off')">OFF</button>
</div>
</div>
<div class="card">
<h2>Classroom light</h2>
<div>
<button class="btn btn-on" onclick="controlDevice('rgb', 'on')">White ON</button>
<button class="btn btn-off" onclick="controlDevice('rgb', 'off')">OFF</button>
</div>
</div>
<div class="card">
<h2>Curtain control</h2>
<div>
<button class="btn btn-on" onclick="controlDevice('stepper', 'forward')">Open</button>
<button class="btn btn-off" onclick="controlDevice('stepper', 'reverse')">Close</button>
</div>
</div>
<div class="card">
<h2>Door</h2>
<div>
<button class="btn btn-on" onclick="controlDevice('servo', '90')">Open</button>
<button class="btn btn-off" onclick="controlDevice('servo', '180')">Close</button>
</div>
</div>
</div>
<p class="update-time">the latest update: <span id="update-time">--</span></p>
</div>
<script>
function controlDevice(device, state) {
fetch('/control?device=' + device + '&state=' + state)
.then(response => response.text())
.then(data => console.log(data))
.catch(error => console.error('Control error:', error));
}
function refreshData() {
fetch('/data')
.then(response => response.json())
.then(data => {
document.getElementById('temperature').innerHTML = data.temperature.toFixed(1) + ' °C';
document.getElementById('humidity').textContent = data.humidity.toFixed(0) + '%';
document.getElementById('light-value').textContent = data.light;
const now = new Date();
document.getElementById('update-time').textContent = now.toLocaleTimeString();
})
.catch(error => console.error('Obtain dara failed:', error));
}
// Obtain data when the page is loading
window.onload = refreshData;
// Refresh the data every 2 seconds
setInterval(refreshData, 2000);
</script>
</body>
</html>
)=====";
server.send(200, "text/html", html);
}
// Handle data API requests
void handleData() {
// Obtain sensor data
float temperature = 0;
float humidity = 0;
int lightValue = 0;
// Directly read the data from the AHT20 sensor
temperature = aht20.getTemperature();
humidity = aht20.getHumidity();
lightValue = analogRead(LIGHT_SENSOR_PIN);
// Create a JSON response
String json = "{";
json += "\"temperature\":" + String(temperature) + ",";
json += "\"humidity\":" + String(humidity) + ",";
json += "\"light\":" + String(lightValue);
json += "}";
server.send(200, "application/json", json);
}
// Handle control requests
void handleControl() {
if (server.hasArg("device") && server.hasArg("state")) {
String device = server.arg("device");
String state = server.arg("state");
if (device == "led") {
if (state == "on") {
digitalWrite(LED_PIN, HIGH);
server.send(200, "text/plain", "OK");
} else if (state == "off") {
digitalWrite(LED_PIN, LOW);
server.send(200, "text/plain", "OK");
}
}
else if (device == "rgb") {
if (state == "on") {
setRGBWhite();
server.send(200, "text/plain", "OK");
} else if (state == "off") {
setRGBOff();
server.send(200, "text/plain", "OK");
}
}
else if (device == "stepper") {
if (state == "forward") {
// forward 2 turns
myStepper.step(STEPS_PER_REV * 2);
server.send(200, "text/plain", "OK");
} else if (state == "reverse") {
// reverse 2 turns
myStepper.step(STEPS_PER_REV * -2);
server.send(200, "text/plain", "OK");
}
}
else if (device == "servo") {
servoAngle = state.toInt();
myservo.write(servoAngle);
server.send(200, "text/plain", "OK");
}
}
}
Code Explanation
Here covers extracurricular knowledge of HTML, CSS, and JS, so we only provide a brief introduction.
Network function
WiFi connection
Web server (port 80)
Sensor data monitoring
Temperature monitoring: The AHT20 sensor monitors the ambient temperature in real time
Humidity monitoring: The AHT20 sensor monitors the ambient humidity in real time
Light monitoring: The photoresistor detects the intensity of ambient light
Device control
Street lamp control: Control the on and off of the LED through pin GPIO 12
Classroom light control: Turn on/off the white light of RGB LED strip
Curtain control: Open/close the curtain by the forward/reverse rotation of the stepper motor
Door control: Open/close the school gate by the servo (servo rotates to 90° to open the gate and 180° to close it)
User interface
Web interface: Responsive page that supports access on both computers and mobile phones
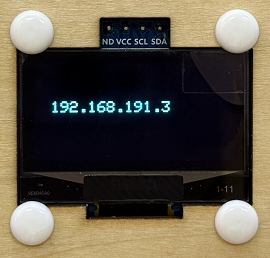
OLED display: Local display of the IP address
Test Result
After uploading the code, open the serial monitor and set the baud rate to 115200. You can see the printed IP information:

The IP address will also be printed on the OLED at the same time.
Enter your IP address in the browser of your mobile phone/computer to access the smart school page.
Note: Make sure your mobile phone/computer and ESP32 are connected to the same WiFi.
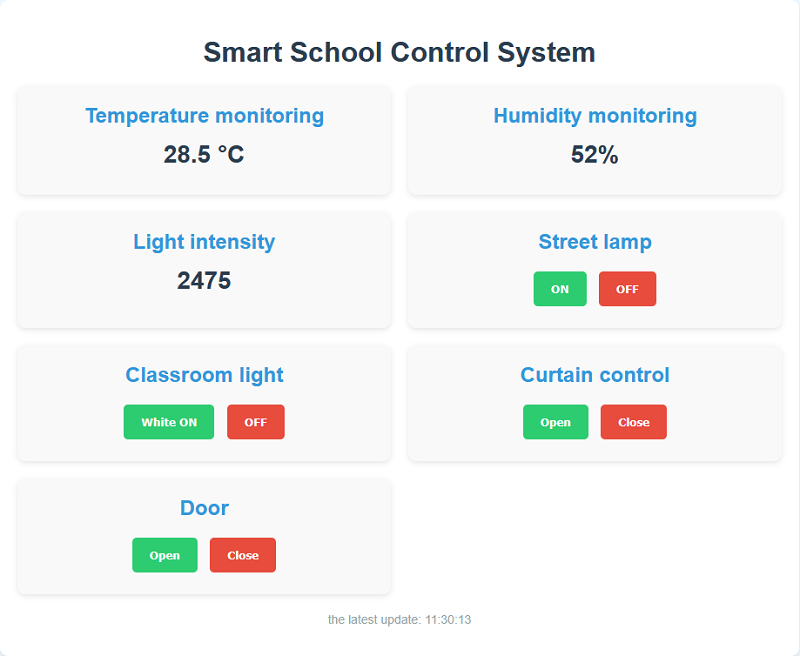
We can see the temperature values, humidity values and indoor light values in real time on the web page, which is convenient for us to monitor the situation in the classroom.
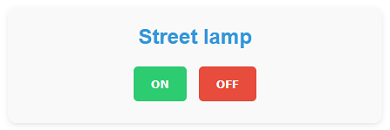
Press ON to turn on the street lamp; Press OFF to turn off the lamp.
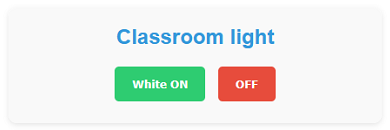
Press White ON to turn on the classroom light; Press OFF to turn off the light.
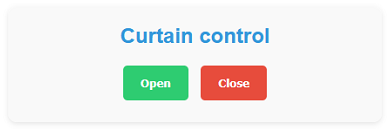
Press Open to open the curtain; Press Close to close the curtain.

Press Open to open the school gate; Press Close to close the gate.
FAQ
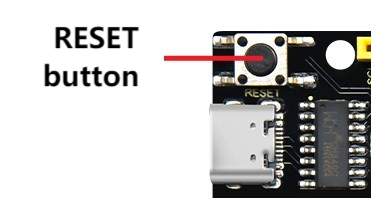
If nothing is printed on the serial monitor, please press the reset button on the board.
If the ESP32 has not been able to obtain an IP address, it is usually because the WiFi connection has failed. Solutions:
Make sure that the WiFi name and password in the code have been replaced with yours.
Make sure your WiFi network is 2.4GHz. ESP32 does not support 5GHz WiFi.
If there is no page when entering the IP address,
Make sure the IP address is entered correctly.
Check whether your mobile phone/computer is on the same network as the ESP32.